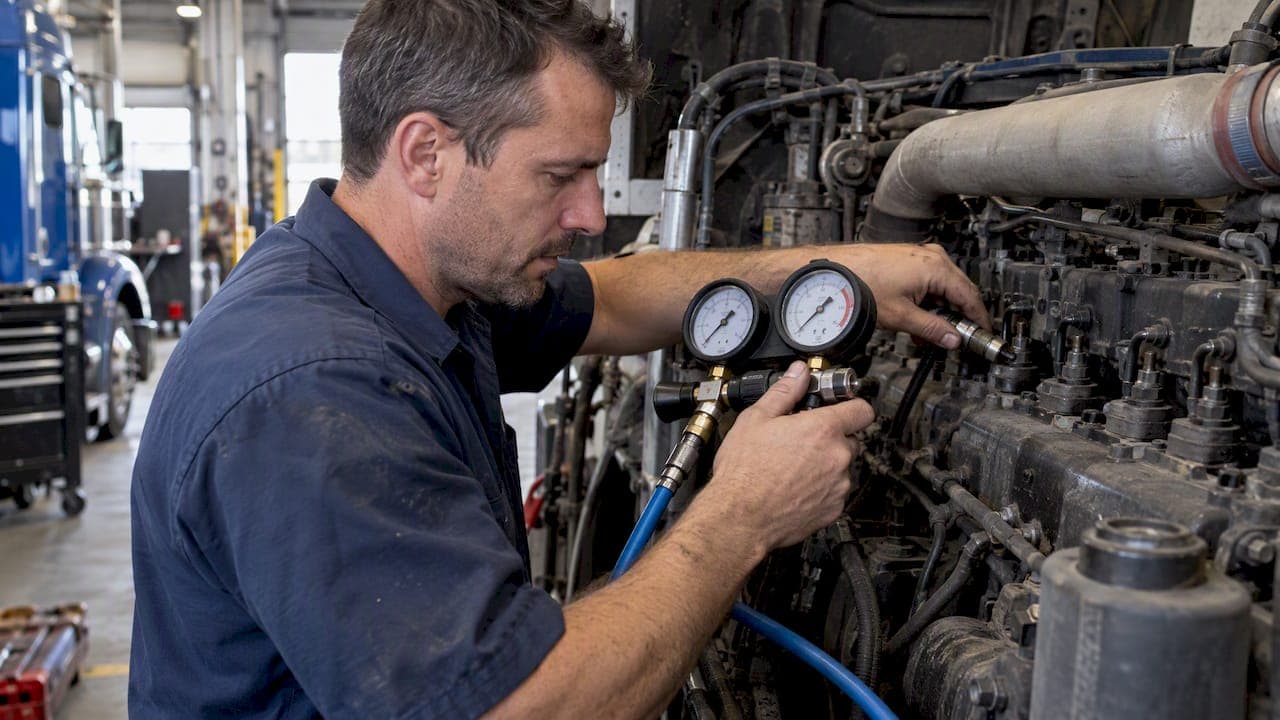
A diesel leak down test measures how much air a cylinder loses under static pressure and shows where the air escapes: past the rings, the valves, or the head gasket. Run it when you suspect blowby, low compression, or one weak cylinder. If the readings come back abnormal, follow the procedure below or hand the engine to a trained technician.
TL;DR:
- Lock the crankshaft at compression TDC before applying air, then use the correct sealed glow plug or injector adapter and calibrate the tester.
- Many shops treat leakage above roughly 20% as a warning, but follow the engine maker’s calibrated limit whenever one is available.
- Air at the oil filler points toward rings, intake or exhaust hiss indicates a valve leak, and coolant bubbles suggest a gasket or cracked head.
- Treat static leakage as a clue, not proof of performance under load; compare cylinders on one tester and confirm suspects with a borescope.
- Record regulator pressure, repeat borderline results under matching conditions, and use borescope evidence, repair costs, and downtime to guide the next step.
Table of Contents
- How do you run a diesel leak down test step by step?
- What equipment do you need for a leak down test?
- How do you read leak down percentages on a diesel?
- What safety and prep checks come first?
- How do you find where the leak is coming from?
- Should you repair the engine or replace it?
- How does engine type and configuration change the test?
- How can maintenance keep leak down readings low?
- Does fuel type or combustion character affect the results?
- Where does leak down testing fit in routine diagnostics?
- How do we help when your diagnostics point to a replacement?
- FAQ
- Sources
- Where can you verify procedure details?
How do you run a diesel leak down test step by step?
Diesel service training materials describe the same core sequence every shop uses: bring the cylinder to TDC on the compression stroke, pull the glow plug or injector, connect and calibrate the tester, then introduce controlled air and read the leakage. Here is the workflow we recommend in a working shop:
- Rotate the engine until cylinder one sits at TDC on the compression stroke, then lock the crankshaft or flywheel so it cannot turn.
- Remove the glow plug or injector for that cylinder. Pull the valve cover if you need to confirm both valves are closed.
- Calibrate the tester on its master orifice and set the regulator to your shop pressure. Many shop guides use 100 PSI, while some OEM documents use 80 PSI.
- Thread the adapter into the glow plug or injector port, connect the hose, and make sure the fitting seals tight.
- Introduce air slowly. Record the regulator reading and the cylinder gauge reading, then work out the percent leakage the way your tester's instructions describe.
- Listen at the oil filler, intake, exhaust, and coolant system while the cylinder is pressurized.
- Log the result, rotate to the next cylinder in firing order, and repeat.
Keep the tester, hose, and regulator setting the same for every cylinder. A reading from one setup cannot be compared to a reading from another, because the numbers are relative to the tester's calibrated orifice and the ambient conditions.
If a cylinder gives a borderline number, test it a second time before drawing conclusions. A repeat reading that matches the first is a real reading. One that wanders usually points to a loose adapter or a hose fitting that is bleeding air.
Pro Tip: Write down the regulator pressure next to every cylinder reading. When you compare notes months later, that one number tells you whether the test conditions really matched.
For a deeper look at how testing fits into the larger diagnostic picture, our technical guide to diesel engine testing covers the other checks worth running alongside it.
What equipment do you need for a leak down test?
You do not need a big kit, but you do need the right one. The tester has to give you trustworthy numbers, and the adapters have to seal the cylinder or the readings mean nothing.
- A dual-gauge leak-down tester. One gauge shows regulated input pressure and the other shows what remains in the cylinder. The gap between them is your leakage, so a single-gauge tool cannot do the job.
- Adapters that fit your port. Glow plug and injector bores differ by engine. The OTC5609 tool instruction lists the assembly steps: remove the plug, install the correctly sized adapter, connect the hose to the regulator, and connect the regulator to compressed air. Snug the adapter and confirm it does not hiss before you read anything.
- A shop air compressor with a regulator. Technicians commonly feed the tester from shop air regulated to 110–125 PSI, then set the tester's own regulator to 100 PSI. Check hoses and quick-connect fittings for leaks before you start, since a bleeding hose looks exactly like a leaky cylinder.
- The master orifice. This is the calibration reference that ties your gauge scale to your specific tester.
- A borescope. It is not part of the test itself, but it is what you reach for when the numbers point at rings, valves, or bore damage.
If you are building a kit from scratch, buy the tester and a complete adapter set for your engine family at the same time. Hunting for a missing thread size with a cylinder open and the crank locked wastes more time than any other mistake.
How do you read leak down percentages on a diesel?
A leak-down percentage is a relative number. It compares how much air escapes the cylinder with a known orifice inside the tester, so it only means something when you stay on the same tool. Compare cylinder to cylinder on one engine with one tester, and treat the result as a pattern rather than a single pass or fail number.
Two reference points show up in practice:
- Shop guidance. Many shop references treat readings up to roughly 20% as acceptable, and call for repair above that.
- OEM differential-pressure procedures. One service bulletin uses an 80 PSI test pressure for safety and requires calibrating with a master orifice to establish the acceptable leakage limit for that equipment and those atmospheric conditions.
These do not conflict. The shop number is a rule of thumb for a generic tester. The OEM method defines its limit through calibration. When you have the manufacturer's procedure for your engine, follow it. When you do not, use the shop threshold as a screening tool and lean heavily on cylinder-to-cylinder comparison.
Here is how to read the pattern:
- Low, even readings across all cylinders suggest ordinary wear.
- One cylinder noticeably higher than its neighbors is your teardown candidate.
- Moderate leakage with air at the intake or exhaust points to valve seating.
- Heavy leakage with air at the oil filler points to rings.
- Heavy leakage with bubbles in the coolant points to the head gasket or a cracked head.
Static tests are not combustion. Piston rings and valve seats depend on very high combustion pressures to seal completely, so a static leak-down number is a diagnostic indicator, not a verdict on how the engine behaves under load.
What safety and prep checks come first?
Most leak-down mishaps happen before the first reading. Take a few minutes to set up properly.
- Lock the crankshaft at TDC. Air pressure on a piston that is not at TDC can push it down and spin the crankshaft and flywheel without warning. Secure the flywheel before you apply any air.
- Mind engine temperature. Warm-engine testing is generally more accurate than cold, though you must be careful around hot manifolds and fluids. Whatever you choose, test every cylinder under similar conditions.
- Control the air. Use a regulator, never raw shop pressure, and stay at your chosen test pressure. Inspect hoses and fittings for cracks or loose couplers.
- Wear protection. Eye and hand protection is the minimum. Keep tools, rags, and people clear of the fan, belts, and flywheel area.
- Mark your work. Label each cylinder reading as you go so nothing gets swapped when you move down the firing order.
How do you find where the leak is coming from?
Once a cylinder is pressurized, the engine tells you where the air is going. The training material notes the test helps identify leaks into the intake, exhaust, crankcase, or cooling system. Work through the listening points in order:
- Listen at the oil filler or crankcase breather. Air here points to the rings. Some crankcase leakage is normal on a diesel, so it only matters when the gauge also shows excess leakage and the crankcase is the single audible source.
- Listen at the intake manifold or airbox. A hiss here means an intake valve is not seating.
- Listen at the exhaust outlet or muffler. A hiss here means an exhaust valve is leaking.
- Look at the radiator or coolant reservoir. Bubbling while the cylinder is pressurized points to a head gasket or a cracked head.
- Run a borescope into the port to check valve faces, piston crown, and cylinder wall condition on any suspect cylinder.
Two quick checks help confirm blowby. A technician can place the oil filler cap upside down and watch for wobble with the engine running, or use a blowby flow meter on the crankcase tube. Pull an oil sample too, and look for contamination or unusual iron content.
Finally, put every cylinder's numbers side by side. An uneven pattern tells you which cylinder to open first. Our guide on what an engine run test verifies shows what to add after the leak-down results are in.
Should you repair the engine or replace it?
The readings and the borescope together decide this. Moderate leakage with visual evidence of valve or gasket trouble usually justifies valve work or head gasket service. Heavy leakage paired with scoring on the cylinder wall or a damaged piston crown means a teardown, and that raises the question of whether a rebuild still makes sense.
Weigh these factors:
- How strong the damage evidence is on the borescope.
- Labor hours for a rebuild versus a swap.
- Parts availability for your engine.
- What each day of downtime costs your fleet or route.
When a rebuild is impractical, we can help. We supply tested, inspected used engines and major components, each backed by a standard warranty and ready for fast shipping. Before you call, run through this checklist:
- Log every cylinder's reading, with test pressure noted.
- Record the engine serial number and take photos of the data plate and any damaged parts.
- Save your borescope images.
- Contact us or your shop with those details and request tested engine options.
Our engine inspection checklist for fleet buyers walks through what to confirm on any replacement unit.
How does engine type and configuration change the test?
The test logic stays the same, but the details shift with the engine. The port you use is the first variable: some engines give you a glow plug bore, others make you pull an injector, and each needs its own adapter. Count on needing the right thread size and seal for your specific family before you start.
Cylinder count and layout affect workflow more than interpretation. An inline six lets you step through the firing order in a straight line. A V-configuration puts banks on opposite sides, so you move around the engine more and should keep your notes organized by bank and position. Large-bore heavy-duty engines also take more air volume to pressurize, which makes compressor capacity and hose condition matter more.

Valve train design changes how you confirm valve position. On engines where you can see rocker arms or lash settings with the valve cover off, you can verify both valves are closed at TDC on compression before you pressurize. On others you rely on the timing marks and the engine's turning procedure, so follow the manufacturer's instructions for that model.
Interpretation depends on the baseline. Because leakage is relative to the tester, an engine with a known history of readings tells you far more than a cold first test. Treat the engine-specific service manual as the authority for adapters, pressures, and limits, and use general shop numbers only to screen.
How can maintenance keep leak down readings low?
You cannot stop wear, but you can avoid the things that speed it up. Most high readings trace back to a few preventable causes.
- Keep air filtration healthy. Dirt that gets past a tired air filter acts like abrasive on cylinder walls and rings. Change filters on schedule and inspect intake ducting for cracks.
- Hold oil change intervals. Contaminated or overextended oil leaves deposits and speeds ring and liner wear. Use the grade the manufacturer calls for.
- Maintain the cooling system. Overheating is a common path to head gasket failure and warped heads. Keep coolant at the right concentration and watch temperature.
- Fix fuel problems early. A leaking or poorly atomizing injector can wash oil from the cylinder wall and cause scuffing.
- Avoid long idling and constant cold starts where you can. Both leave unburned fuel and soot behind that fouls oil.
- Baseline and retest. Frequent testing on the same engine builds the most reliable picture of what acceptable looks like for that unit. A reading that creeps up between services gives you warning long before a failure.
Compare notes with your last inspection each time. Our testing standards guide explains how we approach quality checks on the parts we ship, which is a useful yardstick for your own records.
Does fuel type or combustion character affect the results?
A leak-down test uses shop air, not fuel, so the fuel itself does not change the gauge reading. What fuel and combustion do is shape the wear that you are measuring.
Diesel combustion runs at high compression and puts heavy load on rings and valve seats. Piston rings and valve seats rely on high combustion pressures, often cited in the range of 800 to 1000 PSI, to seal completely in operation. That is why a cylinder can pass a static test and still blow by under load, and why a borderline static number deserves a follow-up inspection rather than a shrug.
Combustion quality leaves a trail. Poor injector spray, incomplete burning, and heavy soot loading can glaze cylinder walls, load up the oil with carbon, and wear rings faster. Fuel dilution of the oil weakens the film that protects the liners. Those effects show up later as higher leak-down readings and crankcase blowby.
When you test, remember the engine is cold-sealing static air against hardware that normally seals under firing pressure. Use leak-down numbers to rank cylinders and decide where to look next, and use oil analysis and a borescope to understand what combustion has done inside.
Where does leak down testing fit in routine diagnostics?
My view: leak-down testing earns its place when you treat it as a trend tool instead of a pass/fail gate. A single threshold like 20% is a fine screening number, but it hides the more useful story. An engine with a cylinder whose readings have crept up over time is telling you something an isolated reading never will.
That is why I push fleets to build baselines. Test each engine at a known good point, keep the same tester and the same pressure, and file the numbers. Gradual deterioration becomes visible, and you get to choose when to act instead of reacting to a breakdown.
I also would not rely on leak-down alone. Pair it with a borescope inspection and oil analysis, and you move from guessing to knowing. The test points to the suspect cylinder, the scope shows the damage, and the oil sample hints at what caused it.
Used this way, leak-down testing lets you prioritize which cylinder to tear down first, or justify sourcing a replacement engine instead of sinking labor into a worn block.
— John
How do we help when your diagnostics point to a replacement?
When the leak-down numbers, the borescope, and your repair math all say the engine is done, we make the swap straightforward. We sell tested, inspected used diesel engines, transmissions, and related parts, and each one carries a standard warranty so you are not gambling on a part you cannot see.
[CTA_IMAGE]

Your next move is simple:
- Gather your engine serial number, your cylinder readings, and photos of the engine and data plate.
- Contact our sales team with those details so we can match you to tested engine options.
- Ask about shipping. We ship fast and nationwide, so downtime stays short.
You can start browsing right now. Our truck engines page lists inspected units, and we also carry transmissions, differentials, and exhausts. If you run Detroit power, take a look at the Detroit Diesel DD15, the Detroit DD13 S1198, and the Detroit DD13. Read our used diesel engine buying checklist before you order, then send us your engine details and we will take it from there.
FAQ
Can you do a leak down test on a diesel engine?
Yes. The procedure matches a gas engine, with the test port coming from a glow plug or injector bore instead of a spark plug hole. Diesel service training materials describe it as a standard way to find where a cylinder is losing air.
What is an acceptable leak down reading?
Shop guidance commonly treats leakage up to about 20% as acceptable, with higher numbers calling for repair, as noted in this leak-down testing guide. Readings are relative to the tester, so compare cylinders on the same engine and follow the manufacturer's limit when you have one.
How much does it cost to have a leak down test done?
Pricing varies by shop, engine size, and how much disassembly is needed to reach the cylinders, so we do not publish a figure here. Call a local diesel shop and ask what their diagnostic rate covers. Doing it yourself costs only the tester and adapters.
How do you do a leak down test on a diesel engine?
Lock the crankshaft at TDC on compression, remove the glow plug or injector, and calibrate and connect the tester. Apply regulated air and read the leakage on the gauge. Listen at the oil filler, intake, exhaust, and coolant to pinpoint the path. For a short refresher, see this three-step leakdown overview.
Sources
Where can you verify procedure details?
Always check the engine-specific service manual, the OEM service bulletins, and your tester's instruction sheet for exact pressures and adapter sizes. Documents such as the OTC5609 tool instruction and the OEM differential-pressure bulletin are the ones we relied on. Some OEM procedures use 80 PSI for safety and require their own calibration steps, so follow those exactly.